
Introduction
If you haven’t done this already…
During times of war it may be a better time than any to setup GeoIP blocking.
Even if you don’t believe you would even be a target!
I believe it is worth it to close the door just in case and get that sweet peace of mind.
Please make sure to read the disclaimer at the bottom of this post.
1. Maxmind account
Before we can configure anything, we need a data source of IP addresses and who they belong to.
We will get this information (for free) from Maxmind.
For this, create an account on their website first.
Once you have created your account, and verified your email address, you can continue to create your license key.
The license key is required to automatically download the database in OPNsense.
Under your account settings, an option should be available to Manage License Keys.
Here, you can generate a new key, give it description and confirm.
If you are asked if the key will be used for GeoIP Update, I selected No here.
Make sure to write your key down somewhere and let’s move on to the next step!
2. Configure the database URL in OPNsense
Armed with your license key from Maxmind, log into your OPNsense firewall and navigate towards:
Firewall > Aliases > GeoIP settings
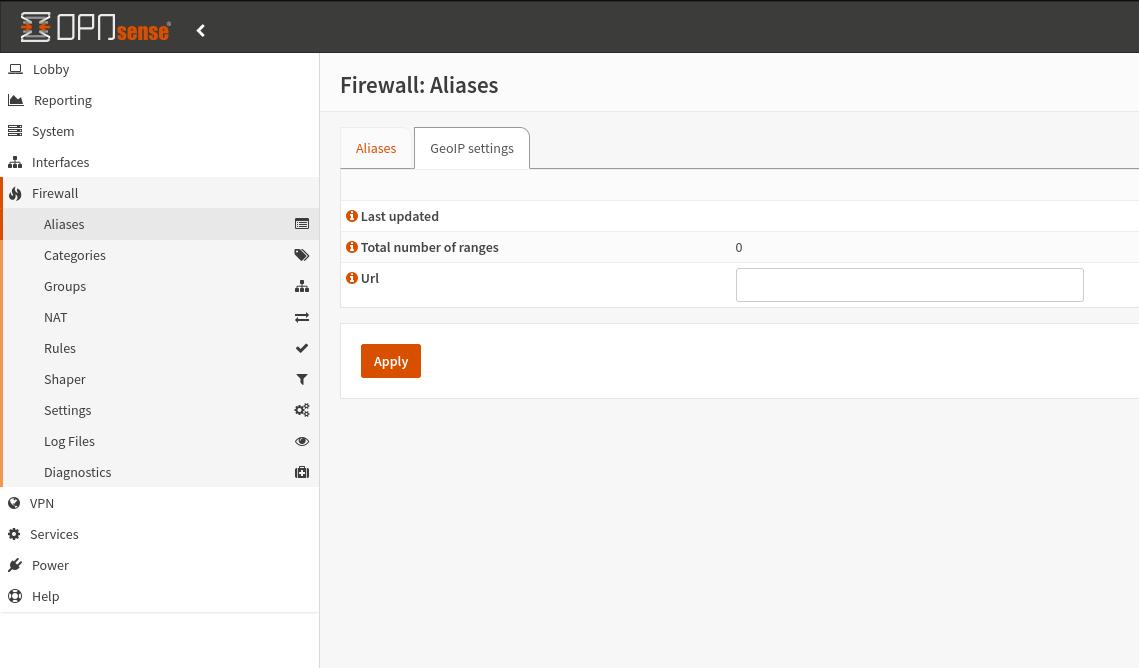
You can have your firewall get the required information by submitting the following URL in the Url field:
https://download.maxmind.com/app/geoip_download?edition_id=GeoLite2-Country-CSV&license_key=YOUR_LICENSE_KEY&suffix=zip
Here YOUR_LICENSE_KEY has to be replaced with the key you wrote down during step 1.
When you have that done, click apply and fields Last updated and Total number of ranges should be updated.
3. Add GeoIP alias
Now that your firewall is able to know what is what, you can configure this information as an alias to be used for further configuration.
Switch back to the Aliases tab, and add an entry to the table.
To create a GeoIP Alias, you must select GeoIP as the Type of alias you wish to create (as seen in the image below).
This will reveal additional options you can specify, in order to have the alias contain the areas you want.
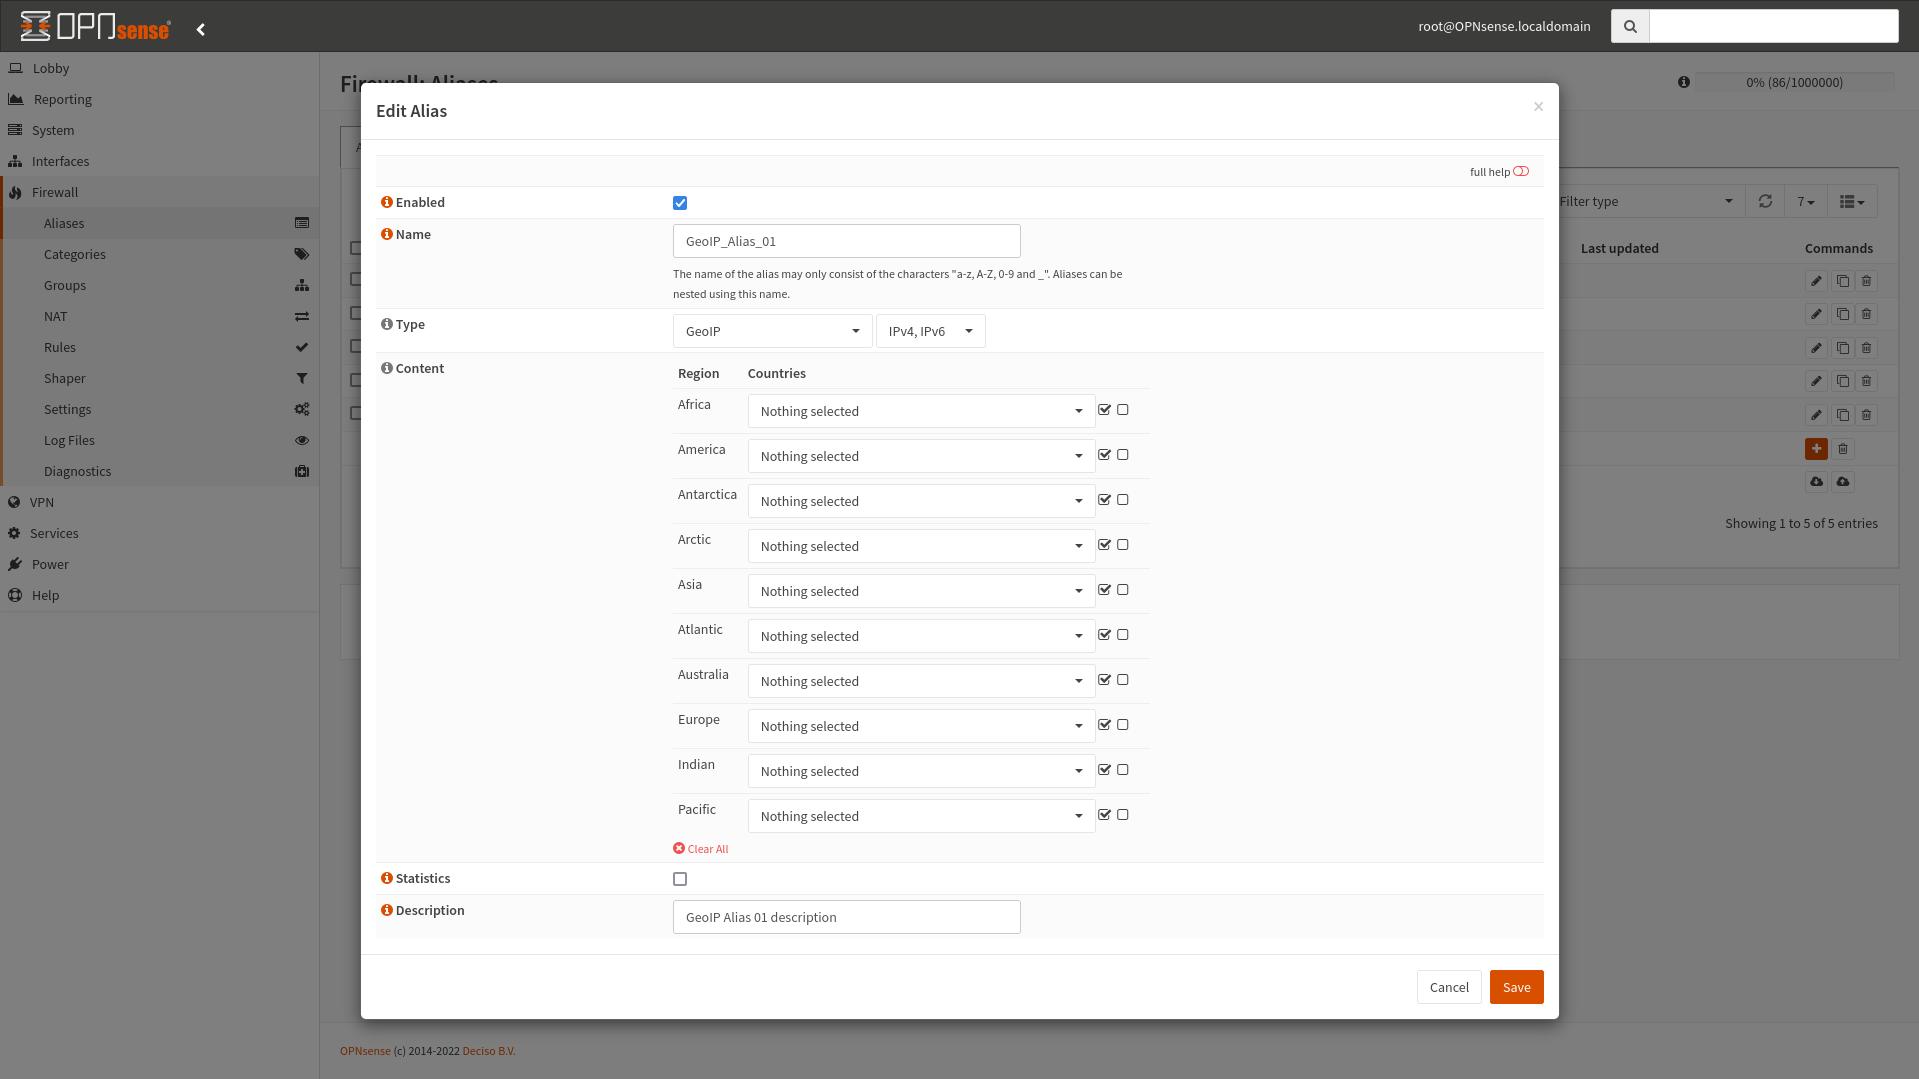 If you want, you can enable statistics.
Finally you may want to add a descriptive description and click Save.
Do not forget to apply the new entry to the table by clicking the Apply button below the Alias table.
4. Add a block rule
Finally, how you choose to use the Alias is up to you.
A simple example would be to block traffic to your WAN from this alias, which is what I will show.
Navigate to Firewall > Rules > WAN and add a rule to the list.
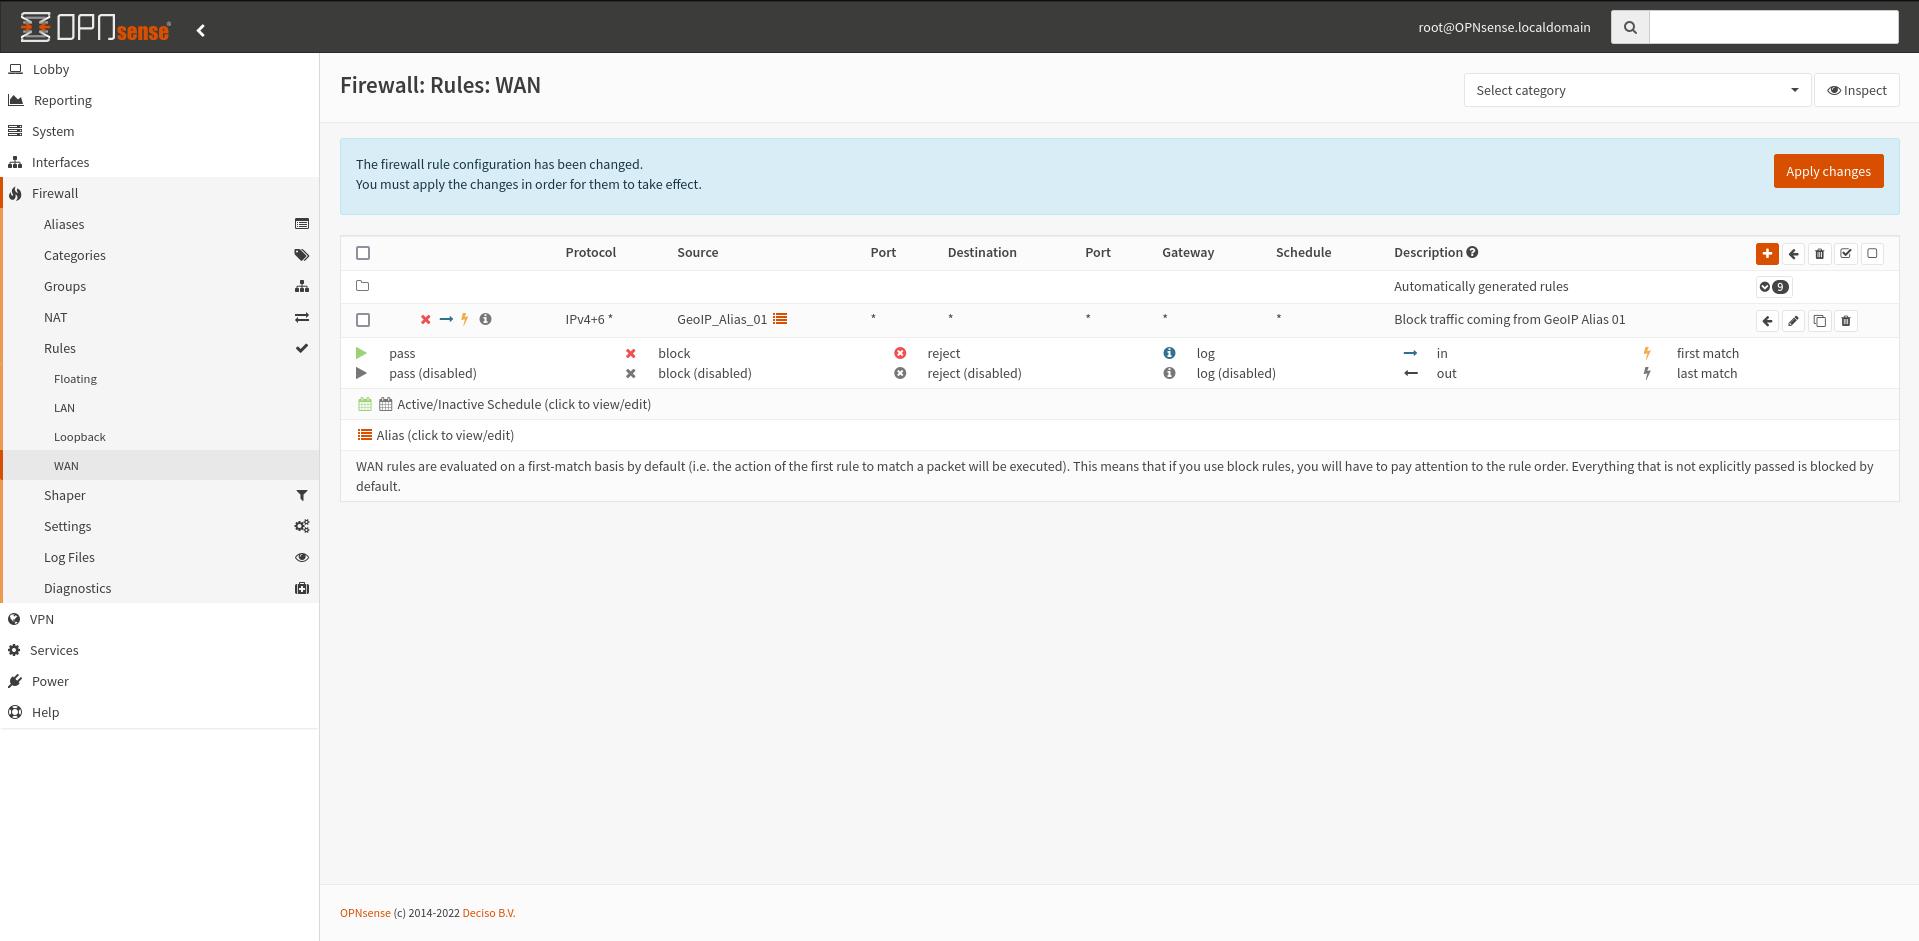 Don’t forget to apply changes when you are done!
Note:
Make sure that your block rule is above any other rules you want it to overrule in the list, as they are read in order (top to bottom).
Disclaimer: Please follow this tutorial on your own behalf. I cannot personally guarantee you this will defend you against anything, depending on your use-case, or help you in any other way.
I know nothing